Craftsmanship and Quality Materials Make All The Difference

Stitching
There's a couple things to look for here. First, you want the double seams in the palm area to be perfectly parallel. The only - and I mean THE ONLY - way to do this consistently time after time is to use a double needle machine. Many manufacturers don't want to have this expense, especially when their primary stitchers have a lot of experience and can sew parallel pretty consistently, but trust me when I say you can always tell the difference between those using a single needle machine twice, and those using a double needle once. We use a double needle machine for this area because we know we have to be 100% consistent on every pair. If a manufacturer is skimping on getting a double needle machine, they're definitely going to be skimping on other parts of the glove.
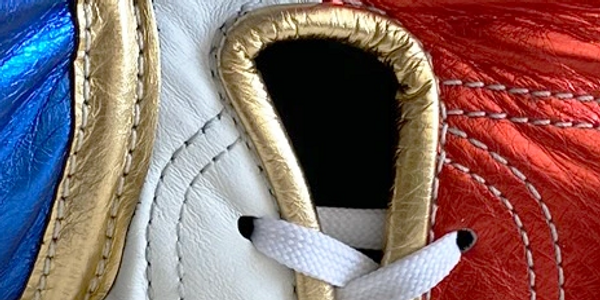
Another area of stitching concern is where the double seams disappear into the main seam of the glove, or into the keyhole opening at the top of the lace area. If you see "backtacking", where the seam doubles back onto itself in order to lock the thread, this shows you that the manufacturer does not want to take the time to (or more likely, just doesn't know how to) lock the stitch inside the glove so that the lock is not visible. A backtacked seam will eventually come loose, but an invisible locked seam will not, so look for this on your next high end glove purchase. And if you see just one thread backtacked, then it was definitely applied by a single needle machine!

Glove Shaping
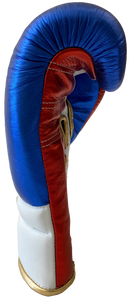
One of the first things you should look for in a glove, beyond the surface appeal, is the shape of the glove. I see several high end gloves that do not have enough curve in the fingers to make it easy to hold a natural fist. If the glove at rest has your fingers poking straight out instead of curving over, then that manufacturer doesn't know how to properly insert the foam, and/or doesn't have the fingertip area correct in their stitching pattern. Gloves that use a machine molded main foam never have this issue (they have plenty of other issues!), but gloves using a layered main foam can run into this problem if the maker doesn't know what they're doing. On our training gloves, we only use layered foam, and it's completely curved, every time. Also look for ill-fitting foam by seeing if the wearer's fingers can be seen moving around in the fingertip area when they open and close the glove - the fingers should be completely enclosed by the foam, and there should be no loose leather that allows the fingertips to swim around.

Thumb Design
Thumb design is critical to the comfort and safety of the glove. You want to have a bit of natural curve to the thumb, particularly near the tip, and you want there to be plenty of padding not only on the back of the thumb, but beyond and around the tip of the thumb as well. The thumb should not really move whether the fist is open or closed - it should essentially be in the same position either way. Also look at the crease where the thumb and pointer finger come together - this area should be smooth and rounded. This isn't very easy to do on a layered foam glove...the foam and pattern must match perfectly, and you have to physically work very hard to get the thumb foam pushed up into that tight thumb pocket. If you see loose leather here, it means the thumb foam and thumb stitching pattern don't match up, which shows you that a) the manufacturer is sloppy and doesn't really know what they're doing, and b) the design may allow your thumb to slide around inside the glove and get injured. If you see loose leather where your thumb connects to the glove, stay away from that glove!

Cuff Stitching
On many gloves, you will see stitching across the cuff that locks the cuff to the main strike surface, and possibly another seam further down that provides a channel for laces - both of these are common practice. However, you should look for one particular detail: If the stitch goes all the way across the cuff and disappears into the seam, that means the stitch was applied before the glove was assembled. Since it was applied before it was assembled, it means that the cuff foam is divided into two or more pieces that don't touch, which never provides as much support as a single, solid cuff does. Look for stitching that does not reach the edge of the cuff - this shows that the seam was applied AFTER the glove was sewn together and the foam inserted. That seam is going through a single piece of foam inside the cuff that is glued directly to the main foam further up above it. With one solid piece of foam in the cuff glued directly to the main foam, and one or two seams going through the leather, cuff foam, and lining (there will be a visible seam inside the glove for every seam on the outside, because it's going all the way through), the cuff will be much stronger and supportive to the wrist. Like the double seams on the palm, this requires a special machine that most manufacturers don't want to invest in, so you rarely see it. That special machine must also be able to sew a very thick thread that will not come loose when backtacked. Look for this feature on your next high end glove purchase!

Thumb Seam Cover
OK, I'll admit, this one has less to do with performance than the other issues, but it does display the skill level of your manufacturer. Take a look at the thumb seam cover on any boxing glove, and you will see one of two types of stitching - either two seams, or one. This particular section of stitching is one of the most complicated to sew regardless of the method used, so I understand why some manufacturers choose to do the simpler method of just one visible line of stitching, where they stitch the leather piece upside down along one side, then fold it over and apply a single visible seam line on the leather, leaving the first stitch line invisible. Doing it this way means you don't have to make both lines visible and parallel along the edge of the leather. Hey, I get it, it's easier. But keeping both lines visible, and perfectly parallel, is a sign of true craftsmanship, so that's how we do it. This is less difficult to do on a glove that uses very thin leather like on imported gloves because everything lays flat - on a high end glove that uses thick leather, it becomes quite a bit more challenging. And it can't be done with a double needle machine - it has to be a single needle, stitched perfectly. It's a small detail, but one that can separate the creme from the crop.

Piping, aka Edge Binding
Piping is the material that wraps around and seals the bottom seam of the glove. There are two ways to apply the piping: an easy way, and a hard way (sounds like a lot of other things in life, no?). The easy way is to use a machine that has the binding material running through a special attachment on the sewing machine that connects it to the glove. This method is extremely fast, but requires that a stitch go directly through the middle of the piping, which is obviously very visible, and in my opinion, very cheap looking and unattractive, especially on high end gloves. All cheap brands use this method, but unfortunately a few high end brands do as well, and frankly it ticks me off. People are spending hundreds of dollars for your product and you slap on this ugly piping with a seam running straight through it?? We and only a couple other manufacturers use a slower, but ultimately much more beautiful method, of applying the piping by stitching it upside down first, then folding it over the edge and stitching up snugly next to the piping, leaving the visible part of the piping completely untouched. The adjacent seam of course is going through the piping on the backside, but all you see is a nice seam along the edge of the piping. This requires a much higher level of skill and application time, which is why you don't see many manufacturers doing it. You want piping done our way because it has two seams running through it (one visible, one not visible), whereas the machine method has only one seam. That seam gets a stitch ripped, and that piping is going to start falling off. If a stitch gets ripped on ours, the piping is still locked on and not going anywhere, because of the additional seam. Last thing: many times these other brands will use a non-leather material for the piping because it saves them money and is easier to run through their machine attachment when stitching the piping. We always use genuine leather for our piping, 100% of the time!